Nginx安装教程

随笔3个月前发布 王昌明
31 0 0

前言:

同步文章图片有问题想看带有图片版的请移步:
https://www.yuque.com/docs/share/3fbd7d5a-639c-4ca8-8500-00071b7cb23d?#BvpWF
本篇文章涉及nginx的安装,目前分为两个版本linux安装和win10的安装
其中nginx的安装涉及到无root权限和在内网的情况下如何安装,对应的安装资源如下:
链接:https://pan.baidu.com/s/1EKGHX2oKIMdD8n7ravVwyQ
提取码:yyds
win10版本的nginx安装包如下:
链接:https://pan.baidu.com/s/1n-6m0UhKhTtSprpzwm9HFA
提取码:yyds

Nginx–linux安装

无root权限安装(内网安装)

1、创建tool目录

![image.png](https://img-blog.csdnimg.cn/img_convert/003749d4e63e0de4393d34f08eaad45d.png#clientId=u7adaedac-c8f4-4&crop=0&crop=0&crop=1&crop=1&from=paste&height=161&id=u03392ca2&margin=[object Object]&name=image.png&originHeight=161&originWidth=387&originalType=binary&ratio=1&rotation=0&showTitle=false&size=7037&status=done&style=none&taskId=u6ce7ee55-ab3c-43b3-afda-f6ff75e4de6&title=&width=387)

2、将nginx安装所需要的依赖放在tool目录下(这里我使用的是ftp工具)

![image.png](https://img-blog.csdnimg.cn/img_convert/469bc879a8382374e74b6e3ccbde5abd.png#clientId=u7adaedac-c8f4-4&crop=0&crop=0&crop=1&crop=1&from=paste&height=547&id=ua803cc0a&margin=[object Object]&name=image.png&originHeight=547&originWidth=823&originalType=binary&ratio=1&rotation=0&showTitle=false&size=75116&status=done&style=none&taskId=u94899d44-05e1-4c90-b095-3cfca0d1e49&title=&width=823)

3、将文件依次解压到当前目录

![image.png](https://img-blog.csdnimg.cn/img_convert/0110b4bb298132200a41e9432b44e5f0.png#clientId=u7adaedac-c8f4-4&crop=0&crop=0&crop=1&crop=1&from=paste&height=182&id=u413672fc&margin=[object Object]&name=image.png&originHeight=182&originWidth=838&originalType=binary&ratio=1&rotation=0&showTitle=false&size=26339&status=done&style=none&taskId=u47c06192-2cdf-4c5f-9bfd-3a1ad70dcf8&title=&width=838)

4、进入nginx-1.18.0目录下执行依次以下命令

注:第一条命令解析:
./configure –prefix=/app/ywgk/nginx –with-http_realip_module –with-http_sub_module –with-http_flv_module –with-http_dav_module –with-http_gzip_static_module –with-http_stub_status_module –with-http_addition_module –with-pcre=/app/ywgk/tool/pcre-8.44 –with-openssl=/app/ywgk/tool/openssl-1.1.1g –with-http_ssl_module –with-zlib=/app/ywgk/tool/zlib-1.2.11
第一处:/app/ywgk/nginx 为nginx安装的绝对路径
第二处:/app/ywgk/tool/pcre-8.44 为上一步解压缩nginx的依赖pcre的绝对路径
第三处:/app/ywgk/tool/openssl-1.1.1g 为上一步解压缩nginx的依赖openssl的绝对路径
第四处:/app/ywgk/tool/zlib-1.2.11为上一步解压缩nginx的依赖zlib的绝对路径

第一条:注(/app/ywgk/tool 此处填写绝对路径)
./configure --prefix=/app/ywgk/nginx --with-http_realip_module --with-http_sub_module --with-http_flv_module --with-http_dav_module --with-http_gzip_static_module --with-http_stub_status_module --with-http_addition_module --with-pcre=/app/ywgk/tool/pcre-8.44 --with-openssl=/app/ywgk/tool/openssl-1.1.1g --with-http_ssl_module --with-zlib=/app/ywgk/tool/zlib-1.2.11
第二条:
make
第三条:
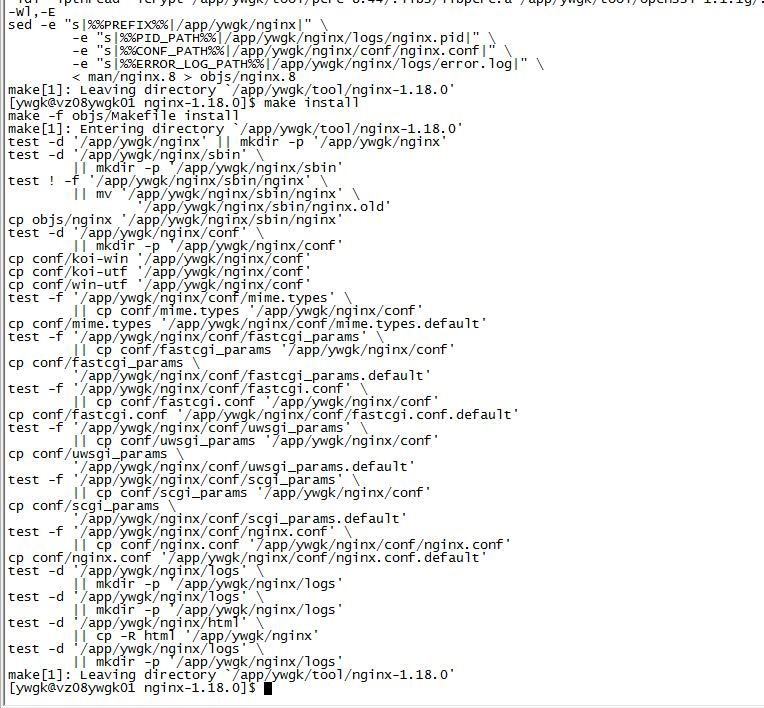
make install

123456
![image.png](https://img-blog.csdnimg.cn/img_convert/ceca94db81e3af26d63488089527c259.png#clientId=u7adaedac-c8f4-4&crop=0&crop=0&crop=1&crop=1&from=paste&height=708&id=u377803f0&margin=[object Object]&name=image.png&originHeight=708&originWidth=764&originalType=binary&ratio=1&rotation=0&showTitle=false&size=95973&status=done&style=none&taskId=u38cdb866-50b9-4620-9f71-dfdaea9f94c&title=&width=764)

5、去到/app/ywgk/nginx下可以看到nginx安装完成

![image.png](https://img-blog.csdnimg.cn/img_convert/c1b2b3fe193ac2495ce34e2a6cc642f0.png#clientId=u7adaedac-c8f4-4&crop=0&crop=0&crop=1&crop=1&from=paste&height=108&id=u06dd3838&margin=[object Object]&name=image.png&originHeight=108&originWidth=280&originalType=binary&ratio=1&rotation=0&showTitle=false&size=3417&status=done&style=none&taskId=u43da241b-5bdf-4039-a539-679e671cb77&title=&width=280)
访问对应ip加端口可以看到nginx的首页
![image.png](https://img-blog.csdnimg.cn/img_convert/b7180fb78bd6fcfdef171a89ff4d8715.png#clientId=u7adaedac-c8f4-4&crop=0&crop=0&crop=1&crop=1&from=paste&height=256&id=u35a67497&margin=[object Object]&name=image.png&originHeight=440&originWidth=960&originalType=binary&ratio=1&rotation=0&showTitle=false&size=19213&status=done&style=none&taskId=u845cffa5-8a82-4a4c-b24c-ffc06458cb8&title=&width=558)

有root权限安装(可以连接外网)

1、Nginx依赖-gcc

1.1、gcc简介

Gcc(GNU C Compiler)是GNU推出的功能强大、性能优越的多平台编译器。安装nginx需要通过Gcc工具进行编译,生成ngixn的可执行的文件。

1.2、检测gcc安装版本
gcc -v

1

未安装
![image.png](https://img-blog.csdnimg.cn/img_convert/a987b2abece2763b7f19552b412385b3.png#clientId=ub6999b20-2a2b-4&crop=0&crop=0&crop=1&crop=1&from=paste&height=43&id=ub412a6bc&margin=[object Object]&name=image.png&originHeight=43&originWidth=303&originalType=binary&ratio=1&rotation=0&showTitle=false&size=2468&status=done&style=none&taskId=u46146848-35a7-48fb-ae84-37cdfec1538&title=&width=303)
已安装
![image.png](https://img-blog.csdnimg.cn/img_convert/82f44f012e7b246f8282c9135e151e05.png#clientId=ub6999b20-2a2b-4&crop=0&crop=0&crop=1&crop=1&from=paste&height=226&id=tNGEm&margin=[object Object]&name=image.png&originHeight=226&originWidth=937&originalType=binary&ratio=1&rotation=0&showTitle=false&size=29865&status=done&style=none&taskId=u507643cf-a1a4-4628-8010-bfa4b5b83b9&title=&width=937)

1.3、安装gcc
yum install gcc-c++

1

![image.png](https://img-blog.csdnimg.cn/img_convert/ac37e7b44c27512084d07bb35e3cbc93.png#clientId=ub6999b20-2a2b-4&crop=0&crop=0&crop=1&crop=1&from=paste&height=185&id=u95a94a74&margin=[object Object]&name=image.png&originHeight=185&originWidth=743&originalType=binary&ratio=1&rotation=0&showTitle=false&size=12017&status=done&style=none&taskId=ue463621c-ab02-4261-ae66-ad6fa3b3e90&title=&width=743)

2、Nginx依赖-pcre

2.1、pcre简介

PCRE(Perl Compatible Regular Expressions) 是一个Perl库,包括 perl 兼容的正则表达式库。nginx 的 http 模块使用 pcre 来解析正则表达式,所以需要在 linux 上安装 pcre 库,pcre-devel 是使用 pcre 开发的一个二次开发库。nginx也需要此库。

2.2、检测pcre安装的版本
rpm -qa pcre

1
![image.png](https://img-blog.csdnimg.cn/img_convert/8dbf2206284a2b01f542ee470fa1f3a7.png#clientId=ub6999b20-2a2b-4&crop=0&crop=0&crop=1&crop=1&from=paste&height=69&id=u4e1d564b&margin=[object Object]&name=image.png&originHeight=69&originWidth=409&originalType=binary&ratio=1&rotation=0&showTitle=false&size=2978&status=done&style=none&taskId=u8819e0bb-5da8-4fba-a9a1-277d1621c04&title=&width=409)
2.3、安装pcre
yum install -y pcre pcre-devel

1

![image.png](https://img-blog.csdnimg.cn/img_convert/950edad5246ea5034c32fb40831488cc.png#clientId=ub6999b20-2a2b-4&crop=0&crop=0&crop=1&crop=1&from=paste&height=217&id=udf4c316b&margin=[object Object]&name=image.png&originHeight=217&originWidth=879&originalType=binary&ratio=1&rotation=0&showTitle=false&size=19210&status=done&style=none&taskId=u02ebf0d5-291f-4068-8aff-ee01112af6a&title=&width=879)

3、Nginx依赖-zlib

3.1、zlib简介

zlib 库提供了很多种压缩和解压缩的方式, nginx 使用 zlib 对 http 包的内容进行 gzip ,所以需要在 Centos 上安装 zlib 库。

3.2、检测zlib安装的版本
rpm -qa zlib

1

![image.png](https://img-blog.csdnimg.cn/img_convert/b7b619c1887008d1130b102ad9cb98b5.png#clientId=ub6999b20-2a2b-4&crop=0&crop=0&crop=1&crop=1&from=paste&height=43&id=u09e690e1&margin=[object Object]&name=image.png&originHeight=43&originWidth=334&originalType=binary&ratio=1&rotation=0&showTitle=false&size=2262&status=done&style=none&taskId=u9e49d72f-2b6a-4039-b533-4653ce3f69b&title=&width=334)

3.3、安装zlib
yum install -y zlib zlib-devel

1

![image.png](https://img-blog.csdnimg.cn/img_convert/5b330f3c8821e75dde167bd6e32ca390.png#clientId=ub6999b20-2a2b-4&crop=0&crop=0&crop=1&crop=1&from=paste&height=185&id=u445cbb4f&margin=[object Object]&name=image.png&originHeight=185&originWidth=813&originalType=binary&ratio=1&rotation=0&showTitle=false&size=16191&status=done&style=none&taskId=u503c54b3-c07a-4af8-9739-4923d8afe28&title=&width=813)

4、 Nginx依赖-OpenSSL

4.1、OpenSSL 简介

OpenSSL 是一个强大的安全套接字层密码库,囊括主要的密码算法、常用的密钥和证书封装管理功能及 SSL 协议,并提供丰富的应用程序供测试或其它目的使用。nginx 不仅支持 http 协议,还支持 https(即在ssl协议上传输http),所以需要在 Centos 安装 OpenSSL 库。

4.2、检测OpenSSL安装版本
rpm -qa|grep -i openssl

1

![image.png](https://img-blog.csdnimg.cn/img_convert/8f057cd78c6478cb61101a1fda56f787.png#clientId=ub6999b20-2a2b-4&crop=0&crop=0&crop=1&crop=1&from=paste&height=78&id=u8e7057ad&margin=[object Object]&name=image.png&originHeight=78&originWidth=395&originalType=binary&ratio=1&rotation=0&showTitle=false&size=4828&status=done&style=none&taskId=u0295062e-b4b4-4086-9732-4876adf7fe4&title=&width=395)

4.3、安装OpenSSL
yum install -y openssl openssl-devel

1

![image.png](https://img-blog.csdnimg.cn/img_convert/2291409473fae95efbe683ff77f39866.png#clientId=ub6999b20-2a2b-4&crop=0&crop=0&crop=1&crop=1&from=paste&height=107&id=u32b1790b&margin=[object Object]&name=image.png&originHeight=107&originWidth=847&originalType=binary&ratio=1&rotation=0&showTitle=false&size=10212&status=done&style=none&taskId=uc8c8fcc1-6bdb-4a08-a490-67bd527280f&title=&width=847)

5、下载nginx安装包

方式一:

去官网(https://nginx.org/en/download.html),我这里选了nginx-1.18.0版本

![image.png](https://img-blog.csdnimg.cn/img_convert/e474e15c062051cc4d204407ebc953fe.png#clientId=ub6999b20-2a2b-4&crop=0&crop=0&crop=1&crop=1&from=paste&height=595&id=u863ca5ca&margin=[object Object]&name=image.png&originHeight=595&originWidth=1088&originalType=binary&ratio=1&rotation=0&showTitle=false&size=77376&status=done&style=none&taskId=ufb7edda8-570c-46cf-b83e-6edb022c95e&title=&width=1088)

方式二:

使用wget命令下载(推荐):

wget -c https://nginx.org/download/nginx-1.18.0.tar.gz

1

![image.png](https://img-blog.csdnimg.cn/img_convert/2e76f69e5a8d6185e46df04c1a445cb1.png#clientId=ub6999b20-2a2b-4&crop=0&crop=0&crop=1&crop=1&from=paste&height=256&id=u0e1e6aff&margin=[object Object]&name=image.png&originHeight=256&originWidth=969&originalType=binary&ratio=1&rotation=0&showTitle=false&size=30819&status=done&style=none&taskId=ub27b1578-194c-42bb-815c-b6f6083307c&title=&width=969)

6、解压缩nginx压缩包

tar -xf nginx-1.18.0.tar.gz

1

![image.png](https://img-blog.csdnimg.cn/img_convert/9a2ea3f2a66e6b6988e588ad0cb3b9d4.png#clientId=ub6999b20-2a2b-4&crop=0&crop=0&crop=1&crop=1&from=paste&height=63&id=uf949c379&margin=[object Object]&name=image.png&originHeight=63&originWidth=520&originalType=binary&ratio=1&rotation=0&showTitle=false&size=3135&status=done&style=none&taskId=u37942a89-9b3a-43da-b928-f4e4c262ae6&title=&width=520)

7、去nginx解压的目录下执行编译安装

依次执行如下命令

cd nginx-18.0
 ./configure
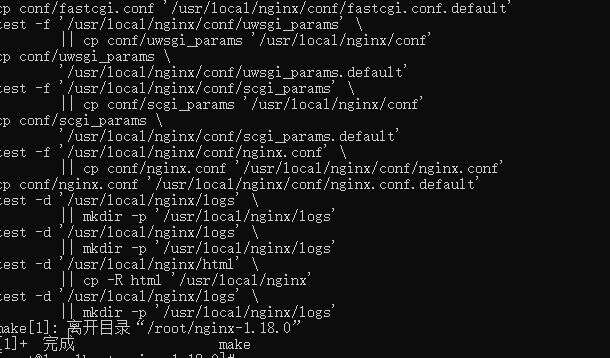
 make & make install

123
![image.png](https://img-blog.csdnimg.cn/img_convert/812526cee7ee48289bc6b0d78559a282.png#clientId=ub6999b20-2a2b-4&crop=0&crop=0&crop=1&crop=1&from=paste&height=358&id=u18e9a04e&margin=[object Object]&name=image.png&originHeight=358&originWidth=610&originalType=binary&ratio=1&rotation=0&showTitle=false&size=28339&status=done&style=none&taskId=udc03f57a-93e1-4e14-9363-808d3784290&title=&width=610)

使用whereis nginx 查看nginx的安装路径
![image.png](https://img-blog.csdnimg.cn/img_convert/aaa51798b1a4533d67c59bcfe9dd8af2.png#clientId=ub6999b20-2a2b-4&crop=0&crop=0&crop=1&crop=1&from=paste&height=106&id=u6062bffb&margin=[object Object]&name=image.png&originHeight=106&originWidth=522&originalType=binary&ratio=1&rotation=0&showTitle=false&size=7238&status=done&style=none&taskId=u00c7f349-5908-4413-85b3-a05a36080b7&title=&width=522)
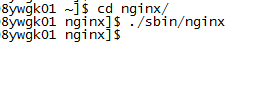
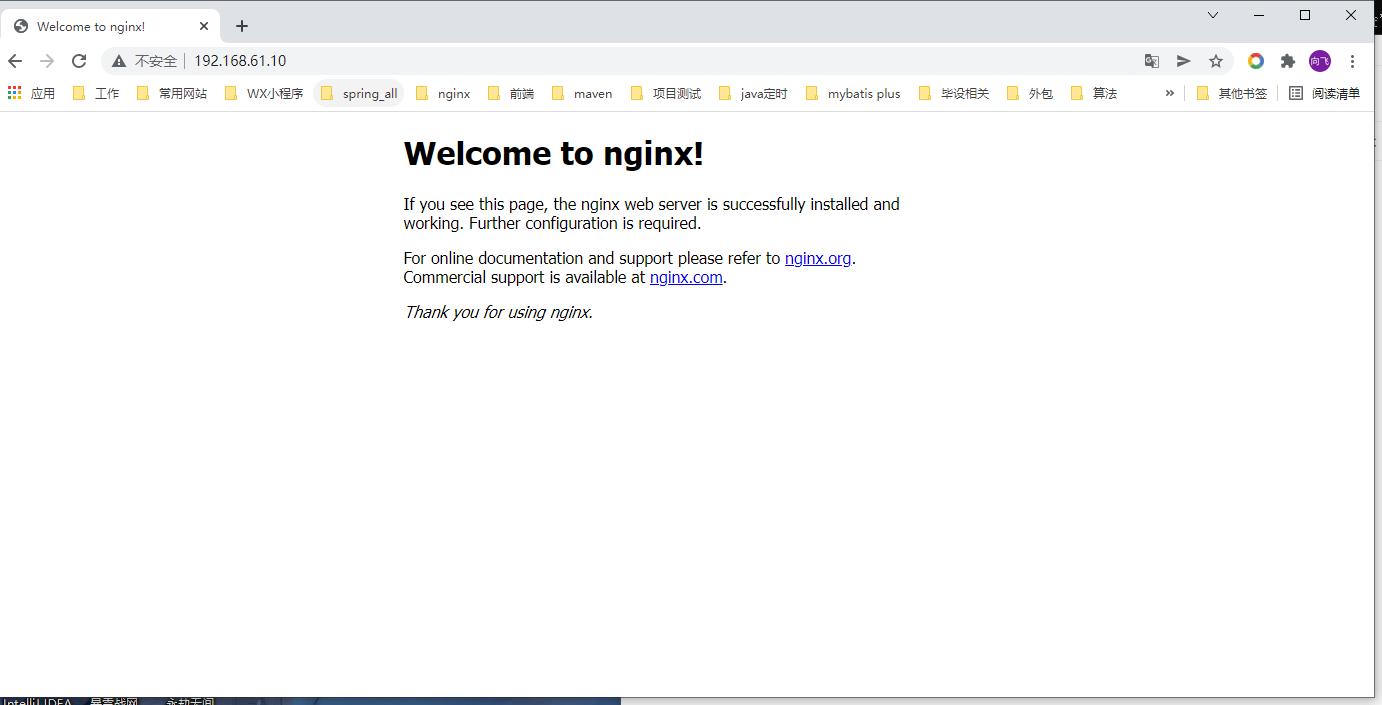
8、启动nginx,可以查看nginx的主页
![image.png](https://img-blog.csdnimg.cn/img_convert/0a60038a259f1fe6ce920a463358a17d.png#clientId=ub6999b20-2a2b-4&crop=0&crop=0&crop=1&crop=1&from=paste&height=74&id=uf30520d5&margin=[object Object]&name=image.png&originHeight=74&originWidth=422&originalType=binary&ratio=1&rotation=0&showTitle=false&size=5064&status=done&style=none&taskId=u8fd83633-b787-4895-9a95-2ffe61b60fd&title=&width=422)
![image.png](https://img-blog.csdnimg.cn/img_convert/ed300fa4bc626f1fd121d261d3f0df44.png#clientId=ub6999b20-2a2b-4&crop=0&crop=0&crop=1&crop=1&from=paste&height=705&id=ub6c582dd&margin=[object Object]&name=image.png&originHeight=705&originWidth=1382&originalType=binary&ratio=1&rotation=0&showTitle=false&size=62070&status=done&style=none&taskId=u27c9c972-c6bc-462f-b253-ea7d32e9e9c&title=&width=1382)

Nginx–windows安装

1、直接进行解压缩

![image.png](https://img-blog.csdnimg.cn/img_convert/655a4bc1379f4118fb3d65ea15ef1779.png#clientId=ub6999b20-2a2b-4&crop=0&crop=0&crop=1&crop=1&from=paste&height=289&id=u23c27fc3&margin=[object Object]&name=image.png&originHeight=289&originWidth=723&originalType=binary&ratio=1&rotation=0&showTitle=false&size=21990&status=done&style=none&taskId=uabfe7615-410b-4417-901a-d9c466dce45&title=&width=723)
2、当前目录下输入cmd 打开黑框
![image.png](https://img-blog.csdnimg.cn/img_convert/477579275ded5b691a1f60d705e23d60.png#clientId=ub6999b20-2a2b-4&crop=0&crop=0&crop=1&crop=1&from=paste&height=661&id=u193f24fe&margin=[object Object]&name=image.png&originHeight=661&originWidth=1139&originalType=binary&ratio=1&rotation=0&showTitle=false&size=90780&status=done&style=none&taskId=u708589ac-ba79-4874-b750-3e4725d6fb9&title=&width=1139)
3、输入.
ginx启动
![image.png](https://img-blog.csdnimg.cn/img_convert/0e315fc542a482ace8f25847aa8566db.png#clientId=ub6999b20-2a2b-4&crop=0&crop=0&crop=1&crop=1&from=paste&height=519&id=u9f1104a7&margin=[object Object]&name=image.png&originHeight=519&originWidth=993&originalType=binary&ratio=1&rotation=0&showTitle=false&size=35047&status=done&style=none&taskId=u64a87999-82ef-4283-86e6-2ecb7731992&title=&width=993)

© 版权声明

相关文章

暂无评论

您必须登录才能参与评论!
立即登录
暂无评论...